Thursday, March 29, 2012

Roasted Vegetable Flatbread

Meatless Monday!


This is by far my favorite pizza/ flatbread recipe.  I have made this flatbread with a variety of toppings, but almost always with olive oil and garlic in place of sauce on the crust.  I do like a good red sauce, but only on a thicker crusted pizza. When making a flatbread  I like it on the crispy side, and the olive oil helps make it that way.  For the dough you could certainly use a store -bought,  frozen one, but this one turns out so great!  If you have the time it is well worth it! This time I roasted an entire head of garlic and mixed it with olive oil and salt and pepper to make a tasty, pasty sauce... it sent the flavor over the top!  If you've never roasted garlic, you need to try it!  It makes it sweet and mild and perfectly delicious for sauces, and spreads.  One of my favorite uses is roasted garlic mayonnaise.  I also roasted the tomatoes to draw out some of the moisture (nobody likes a soggy pie!), and to bring out the sweetness and flavor of them.  I roasted the zucchini and mushrooms to slightly soften them, and roasting brings out their flavor as well.  Toward the end of roasting them I added the spinach to wilt it down.   For the cheese I chose Fontina this time, because it's creamy, mild, and it melts like a dream!  It oozes over the vegetables and creates this perfect little marriage of semi- crisp veggies and creamy, dreamy cheese.  You could, of course, use whatever cheese or combination of cheeses that you like.  As for the herbs I went with fresh oregano and thyme because they are growing rampant in my garden already, and if my garden had basil I would have added some freshly torn on the flatbread after it came out of the oven.  Rosemary and parsley would be great as well.  But I am a slave to my resources... Come June I'll have every herb under the sun!  I am constantly tweaking my pie recipes, and they seem to just keep getting better, so here is my latest...

Flatbread dough:

1 1/2 c. warm water (not too hot or it will kill the yeast)
1/2 tsp.  Active, dry yeast
1/2 tsp. Honey
4 c. Flour ( I used 2 c. white whole wheat and 2 c. unbleached white)
1 tsp. Salt
2 T. Olive oil

Gently stir together the yeast and sugar in the warm water, and let stand still to proof for about 5 minutes.
Then slowly add in 2 cups of the flour, stirring to combine.  Cover, and keep in a warm place ( room temperature is best, but to speed the process you can place in a slightly warmed oven)  until it's bubbling on top and rising slightly.  Slowly stir in the remaining flour.  At this point you could use a stand mixer, but I much prefer the tools that God gave me.  Using my hands I can more accurately gauge the amount of flour that I need to add,  and it's simply therapeutic if you ask me!  Squeezing and kneading the dough is a wonderful stress release.  And when you finally get that perfect pliable, supple ball of dough... it is exhilarating!!!  You may need a little more or less than 2 additional cups, so make sure to completely knead each little bit before adding more.  Knead for about 15 minutes by hand and a bit less if using a machine.  You will want the dough soft and pliable to touch. 


Lightly oil a large bowl and turn the dough in it to coat with the oil.  Let rise in a warm place until doubled in size, roughly an hour.  Once risen turn the dough out onto a floured surface. 


Cut the dough in half, and shape into two slightly flattened out balls. Let set until ready to roll out.

Flatbread toppings:.

1 Garlic head/ whole
1/4 c. Olive oil
Salt and pepper

5 Roma tomatoes, sliced 1/2 inch thick
Olive oil
Salt and pepper

1 lg. Zucchini/ sliced 1/4 inch thick
9 oz. Mushrooms/ sliced 1/4 inch thick
Olive oil
Salt and pepper
3 c.  Fresh spinach

2 T. Capers
2 T. Oregano/ chopped/ fresh
1 T. Thyme/ chopped/ fresh
9 oz. Fontina cheese/shredded

Now, I didn't cut the head off of my garlic before roasting , though many recipes tell you to, I left mine intact, nor did I add any olive oil.  I left my clove untouched... I wrapped it in foil, and roasted it right alongside my tomatoes, and zucchini and mushrooms. 


I roasted all of them at 350 degrees.  For the garlic I roasted it for about an hour.  When I pulled it out I hacked off the shoot end/top, and squeezed the roasted garlicky goodness into a bowl.  You'll want to let it cool a bit, so as to squeeze every ounce of garlic out without singeing a digit. 


Once all squeezed add the 1/4 c. olive oil,  and a pinch of salt and pepper.  Whisk vigorously to combine... you may need to add a little more olive oil to cover two flatbreads.  The key here is to let the garlic infused oil set for a few minutes to allow the garlic to permeate the oil.  Set this aside until ready to use.


Meanwhile, Lay the sliced tomatoes on an olive oiled baking sheet.  Turn to coat, and season with salt and pepper.  Roast in the 350 degree oven for about 50 minutes... untouched!  Just ten minutes less than the garlic.


At the same time you'll want to roast the sliced zucchini and mushrooms in a roasting pan.  Drizzle with olive oil and season with salt and pepper. 


Roast for about 30- 35 minutes, stirring a couple of times.  Add the spinach when the zucchini and mushrooms are slightly softened.  Stir to combine.


When the spinach is wilted set aside until ready to layer on the flatbread.

Assembly:

Preheat the oven to 425 degrees.  Place the oven racks in the center- most positions of the oven, and place your stones/ pans on them to preheat as well.  I used one pizza stone, and one pizza pan with holes all over the bottom.  I actually liked the pizza on the pan better than the one on the stone.  It turned out a little crisper, but the pan is also bigger, so the dough was stretched a little thinner.  Sometimes I use stoneware baking sheets and roll them into rough ovals so they look more rustic.  Use whatever works for you!  On a lightly floured surface roll your dough out to fit your pans/ stones.  A trick to transferring the dough from the work surface is to carefully roll the dough over the rolling pin, and then unwinding onto the pan.  It works like a charm!

Next, I slathered on the roasted garlic olive oil with a pastry brush. 


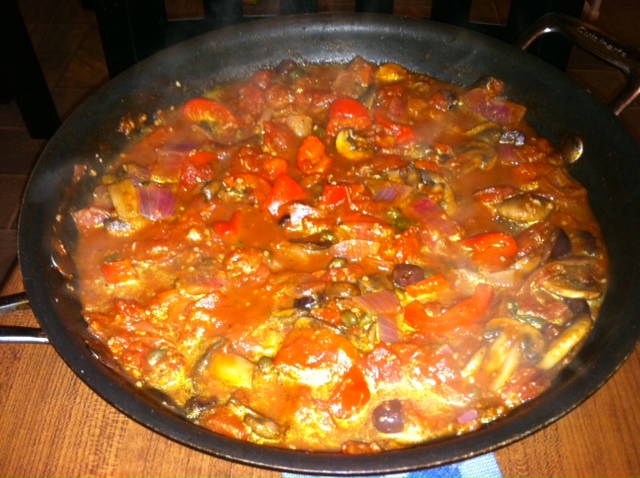
I then layered the zuchhini, mushroom, and spinach mixture on, taking care to spread the ingredients somewhat evenly.  Then, I placed the tomatoes on.  After that I sprinkled on the herbs and capers. 


I had a little helper!  Joshua loves to watch Mama work!


Finally, I sprinkled on the cheese! 


Bake for roughly 17-23 minutes.  Rotating from top to bottom, and bottom to top half way through baking.  Time will vary depending on the pans/ stones you use, so it's best to keep a close eye on them toward the end.  The end product should look something like this.


This tastes so fresh, and delicious!  The roasted garlic on the crust is absolutely divine!  I took care to slather it over the outer edge of the crust. This way... even after the delicious creamy Fontina over the flavor popping veggies are eaten up, I look forward to the crispy, garlicky crust.  Enjoy!


Monday, March 19, 2012

Lobster and Veggie Omelet

Sunday Brunch


Josh and I love our leisurely Sunday Mornings spent reading the paper, drinking coffee, and making brunch.  We don't make a big to- do about it all the time, though.  Sometimes it's as simple as eggs over- easy, bacon, and toast.  Yet, sometimes we like to get creative.  Like this morning with our Lobster and Veggie Omelet.  I always try to use my imaginination with the ingredients that I have on hand to use up.  I was actually thinking of a phenomenal seafood omelet that I had in Key West a few years ago when I came up with this , and yes, it was that unforgettable!  That one had Sea Scallops, and Shrimp with Mascarpone Cheese.  We had Lobster Tails for dinner last night, so that's what I used.  They were small ones, so I bought an extra one just for my brunch idea.  Also, my herb garden is producing some great thyme, and oregano already, so I really wanted to use them.  I believe the Key West omelet used dill and thyme, but I couldn't be certain, and I don't have dill yet, anyhow.  Honestly, you could use whatever herbs you like!  The end product was delicious, though!  Darn close to my scrumptiously fond memory of the Key West Seafood Omelet!

Lobster and Veggie Omelet:

1/4 c. Red Bell Pepper, slices then halved
1/2 c. Mushrooms, sliced
1 cl. Garlic
1 T. Oregano, fresh, chopped
1 tsp.  Thyme, fresh
1 1/2 c. Spinach, fresh
1 1/2 T.  Lemon Juice, fresh
1 T. Capers
salt and pepper to taste
4 lg. Eggs,beaten;  or Egg Beaters
1 1/2 T.  Cream Cheese
2 T.  T. Feta Cheese


In a medium non- stick skillet saute the bell pepper and mushrooms in olive oil over medium heat until just soft, but not cooked all the way through.

Add the garlic, oregano, and thyme and cook for another minute or so.  Add the Spinach and lemon juice, and stir the combine. 

Cover to wilt the spinach (about a minute).  Toss in the capers and salt and pepper to taste.  Transfer this mixture to a plate.  This looks good enough to eat by it's self!


Wipe out the non- stick skillet.  Add a tablespoon or so of olive oil and heat the pan to medium- low.  Add the beaten eggs, salt and pepper to taste, and cover.  Do not stir. 


Cook, covered for about 2-4 minutes, or until there is just a tiny bit of runny egg left on top.


Now, it's time to layer on the filling ingredients.  Turn the burner to low heat. Lay the vegetables over half of the egg, then toss on the lobster chunks.


Finally dollop on the cream cheese, and sprinkle with feta.  At this point I would have sprinkled on some basil if I had it, but I didn't. 


Now, with a wide rubber, or plastic spatula, very carefully fold the top over the filling.  Replace the lid and leave the burner on low heat until the cheese is melted.  This should only take a couple of minutes.  Voila!


This makes a large omelet, enough for two people.


Monday, March 5, 2012

Mediterranean Vegetable Orecchiette

Meatless Monday!


Tonight for our meatless meal we went Mediterranean.  You really don't miss the meat, because it is so full of vibrant flavor... the tomatoes, when stewed, become slightly sweet and when combined with salty olives, capers, and anchovy paste... well, you'll just have to make it and decide for yourself just how well is meshes!  Also, it couldn't be easier!  Add or omit any vegetable to your liking.  Artichoke hearts, zucchini, yellow squash are some other vegetables that go great in this recipe.  For the pasta I used Borrelli's Orecchiette.  It's dried, but it is the closest thing to fresh pasta that is available around here... it's delicious.  I like to make my own pasta, but with a nine- month old that gets more mobile by the minute, I just don't have the time that I used to!  So this is a great substitute.  Honestly, they cook up like plump little dumplings!


Mediterranean Vegetable Orecchiette:


6- 8 oz. Mushrooms, sliced
1 Red Pepper, large dice
1 sm. Red onion, large dice
2 cl. Garlic, minced
salt and pepper
3 T.  Balsamic Vinegar
2 14.5oz. cans Garlic, Basil, and Oregano Diced Tomatoes (No salt added)
2-3 T. Honey, or Agave Nectar
1 tsp.  Anchovy Paste
1/3 c.  Kalamata Olives, sliced
2 oz. Capers
1/2 c. Basil, chiffonaded (sliced into ribbons)/ divided


1 lb. Orecchiette pasta, or any pasta of your choice


Heat a large pot of water to boiling.  Add enough salt to make it taste like sea water ( lots), and a couple of tablespoons of olive oil.  Add the pasta, and cook until al- dente. Drain, and reserve.


Meanwhile, in a large saute pan heat 3 T. olive oil.  Add the mushrooms, pepper, and onion.  Saute until they are soft, and then add the garlic, balsamic vinegar,  and salt and pepper to taste.  Cook for another 3-4 minutes. Add the Tomatoes, Honey/ Agave, Anchovy Paste, Olives, Capers, and 1/2 of the Basil ( 1/4 c.)
Bring to a simmer and continue to simmer for about 10-15 minutes, or until the liquid is cooked out and it looks like a sauce.


For plating, layer the pasta on the bottom, Top with the tomato/ veggie sauce.  Add some fresh grated Parmesan, and fresh basil. Enjoy!


Now, this same basic recipe has many times been the base for grilled fish, shrimp, or scallops, or a side dish!  I'd really prefer a row of skewered, grilled scallops on top of this, BUT it does just fine on it's own.  You can add any veggie your heart desires, as well. Get creative!


Grilled Orange, Ginger and Soy Shrimp with Asian Slaw and Cilantro- Lime Quinoa Pilaf


We love going over to my Mom and Dad's house to cook dinner for them.  They do the cooking sometimes, or it's a combined effort, but it is almost impossible to keep me out of the kitchen completely.  In fact, when I was pregnant and on bed- rest I was constantly being scolded, kicked out of the kitchen, and made to sit back down...I was miserable!  Anyway,  I always tell them I just want to come and play in their kitchen because it is just so fun!  They have the cooking range that I want in the house that we build.  It has four gas burners with an indoor grill.  They also have a double oven.  Fabulous!  Well,  tonight we took over shrimp that had been marinating in a beautiful Orange, Ginger, and Sesame Marinade for about three hours.  I also made up the Asian Slaw earlier in the afternoon.  So, when we got there all we had to do was skewer and grill the shrimp, make the Quinoa, and make the sweet and sour dipping sauce for the shrimp.  This leaves more time for visiting!


Joshua Helping Daddy 

Orange, Ginger, and Soy Marinated Shrimp:

1 c.  Orange Juice
4 T.  Orange Zest
3 T. Rice Wine Vinegar/ White Wine Vinegar
1/2 c.  Soy Sauce
1/2 c. Peanut Oil
4 Clove. Garlic, minced
2 T.  Ginger, minced

2- 3 lb.  Large Shrimp, peeled and deveined

Whisk all marinade ingredients together.  Combine with peeled and deveined shrimp in a large bowl or baggie.  Refrigerate for at least an hour or up to 6 hours.  When ready, skewer the shrimp. Make sure you soak wooden skewers for at least 25 minutes.  You'll want to skewer the head- end first and then skewer through the back shell just above the tail.  This secures the shrimp on really well, so they don't slide off when grilling. 

Josh always grills on charcoal when he can, especially with Shrimp.  Of course gas grilling is fine, or any other method you wish to use to cook them.  No matter the method, the key to perfect shrimp is to NOT OVERCOOK.  Watch them closely, and when they turn opaque/ pink they are done.  If they are overcooked they will be rubbery and chewy... yuck!  However, when cooked perfectly they are tender, juicy, and oh so luscious!  I served these with a home-made sweet and sour sauce.  I make and can pepper jelly in the Fall, so that's what I used, but store bought would be fine.

Sweet and Sour Sauce:

1- 8oz. jar Pepper Jelly (home-made or store bought)
2 T.  Orange Juice
2 T.  Lime Juice
2 tsp.  Orange Zest
2 tsp.  Lime Zest

Mix all ingredients together.  Refrigerate until ready to serve.


Lime, Ginger Slaw:

2 pks. Broccoli Slaw
1 Red Pepper, Julienned
6 Green Onions, Sliced thinly
1 c. Cilantro, chopped

Dressing:
1/2 c. Fresh Lime Juice
2 T. Lime Zest
1/4 c. Soy Sauce
1/4 c. Rice Wine Vinegar/ White Wine Vinegar
1/8- 1/4 c. Agave Nectar ( depending on your taste, and concentration of the Agave)
1/2 c. Peanut Oil
4 cloves. Garlic, minced
2 T.  Ginger, minced

Combine the vegetables and cilantro in a large bowl and set aside.  In a medium bowl whisk together the dressing ingredients.  You may want to taste and tweak the amounts.  I tried really hard to keep track of what I was adding, but I did end up just throwing in a little more this and that without measuring.  This is really close to my final product, though.


Cilantro- Lime Quinoa Pilaf:

1 med. Onion, chopped
2 T.  Olive Oil
salt and pepper
1 T.  Ginger, minced
2-3 cl.  Garlic, minced
1 1/2 c. Quinoa, rinsed and drained thoroughly
1 1/4 c. Chicken Stock
1 Lime, zested and juiced
1/2 cup Cilantro, chopped
3 Green Onions, slice thinly (optional)

Heat the olive oil in a medium saucepan set on medium- low heat.  Add the onion and saute for a few minutes.  Add the ginger and garlic and continue to cook until the onion is soft.  Add the quinoa and increase the heat to medium.  Cook, stirring often until the quinoa is lightly toasted and fragrant.  It will smell nutty.  At this point you will add the broth and lime zest and bring it to a simmer.  Reduce the heat to low and cover.  Simmer for about 16- 18 minutes, or until the quinoa is transparent and tender. 


Remove the pot from the heat and lay a clean kitchen towel over the top, and replace the lid.  Let sit for about ten minutes.  Fluff with a fork, and enjoy! 


I love this recipe!  I've tried several variations using this method, and they've all turned out great.  It turns out a bit al- dente, which I really prefer over traditional quinoa.  The towel over the top absorbs any excess moisture.  Next I'm going try sun-dried tomato, and basil quinoa pilaf! The possibilities are endless! 


Thursday, March 1, 2012

Indian Curry Salmon and Grilled Vegetables with Lime Coconut Sauce

Grilled Indian Curry Salmon and Grilled Vegetables with Lime, Coconut Sauce


It was absolutely gorgeous outside today!  I had an Indian- style dish in mind for our Salmon, tonight.  It included broiling the Salmon and sauteing the vegetables, but the weather was absolutely conducive of grilling and relaxing outside.  So, I made a quick change in recipe plans, which is always easy when it comes to grilling.  If you don't have a grill basket, I recommend you purchase one.  Vegetables just taste so much better with the kiss of an open flame.  Honestly any vegetable with a little olive oil, salt and pepper taste fantastic when grilled! 


So, I drizzled the salmon with olive oil, sprinkled on some Indian- style Curry powder, a pinch of salt, and a drizzle of lime juice.


Meanwhile, I removed the tough ends of the asparagus, sliced the red peppers in about 1/2 inch slices, and sliced the mushrooms in three... they were large mushrooms, though, so if you have small ones you may want to halve them.  I drizzled the vegetables with olive oil and sprinkled with salt and pepper.  I tossed to coat, and placed them in a grill- basket.  If you don't have a grill- basket just saute or oven roast!

As always I put Josh on grill duty, because I have been blessed with a grill savvy husband.  I have very rarely had an under- or- over cooked piece of meat from him.  The man can grill anything to perfection! I had him place thinly sliced Feta Cheese on top of the fish at the last minute... perfect addition!  Anyone that says cheese and fish don't go together has never tried this combination!  The saltiness of the cheese counteracts the spiciness of the Curry, while magnifying the sweet and citrus flavor of the the sauce!  Perfection!  While he was grilling I made this Coconut- Lime sauce to complement both the fish and vegetables.

Coconut- Lime Sauce:

1 T. Coconut Oil
2 tsp.  Ginger, minced
2 clove  Garlic, minced
3/4 c. Coconut milk(canned, stirred)
2 tsp. Lime zest
3 T. Lime juice
1 1/2 tsp. Fish sauce
1 T. Agave Nectar
3 T. Cilantro, chopped

I melted the coconut oil over medium heat.  Once melted,  I added the ginger and garlic; sauteing until fragrant.  I added the coconut milk, lime zest and juice, fish sauce, and Agave nectar before the ginger and garlic had a chance to burn. I let this slow boil until reduced to about half.  Once reduced I took it off of the heat, added the Cilantro, and let it set.


This sauce was a perfect drizzle for both the Salmon, and the vegetables.  Just remember, Coconut milk and oil is super healthy for you!  If you haven't explored the benefits of this super- food, do so!  Dr. Mercola has a wonderful site dedicated to coconut oil!  http://articles.mercola.com/sites/articles/archive/2001/03/24/coconut-oil-part-one.aspx

When I plated this dish, I drizzled the tangy, salty, sweet, delicious sauce over the grilled vegetables and Salmon.  Mmm...Mmm....Mmm! This dish is the perfect example of simple, gourmet.